
previous

next

index

home
Cruciform Kite
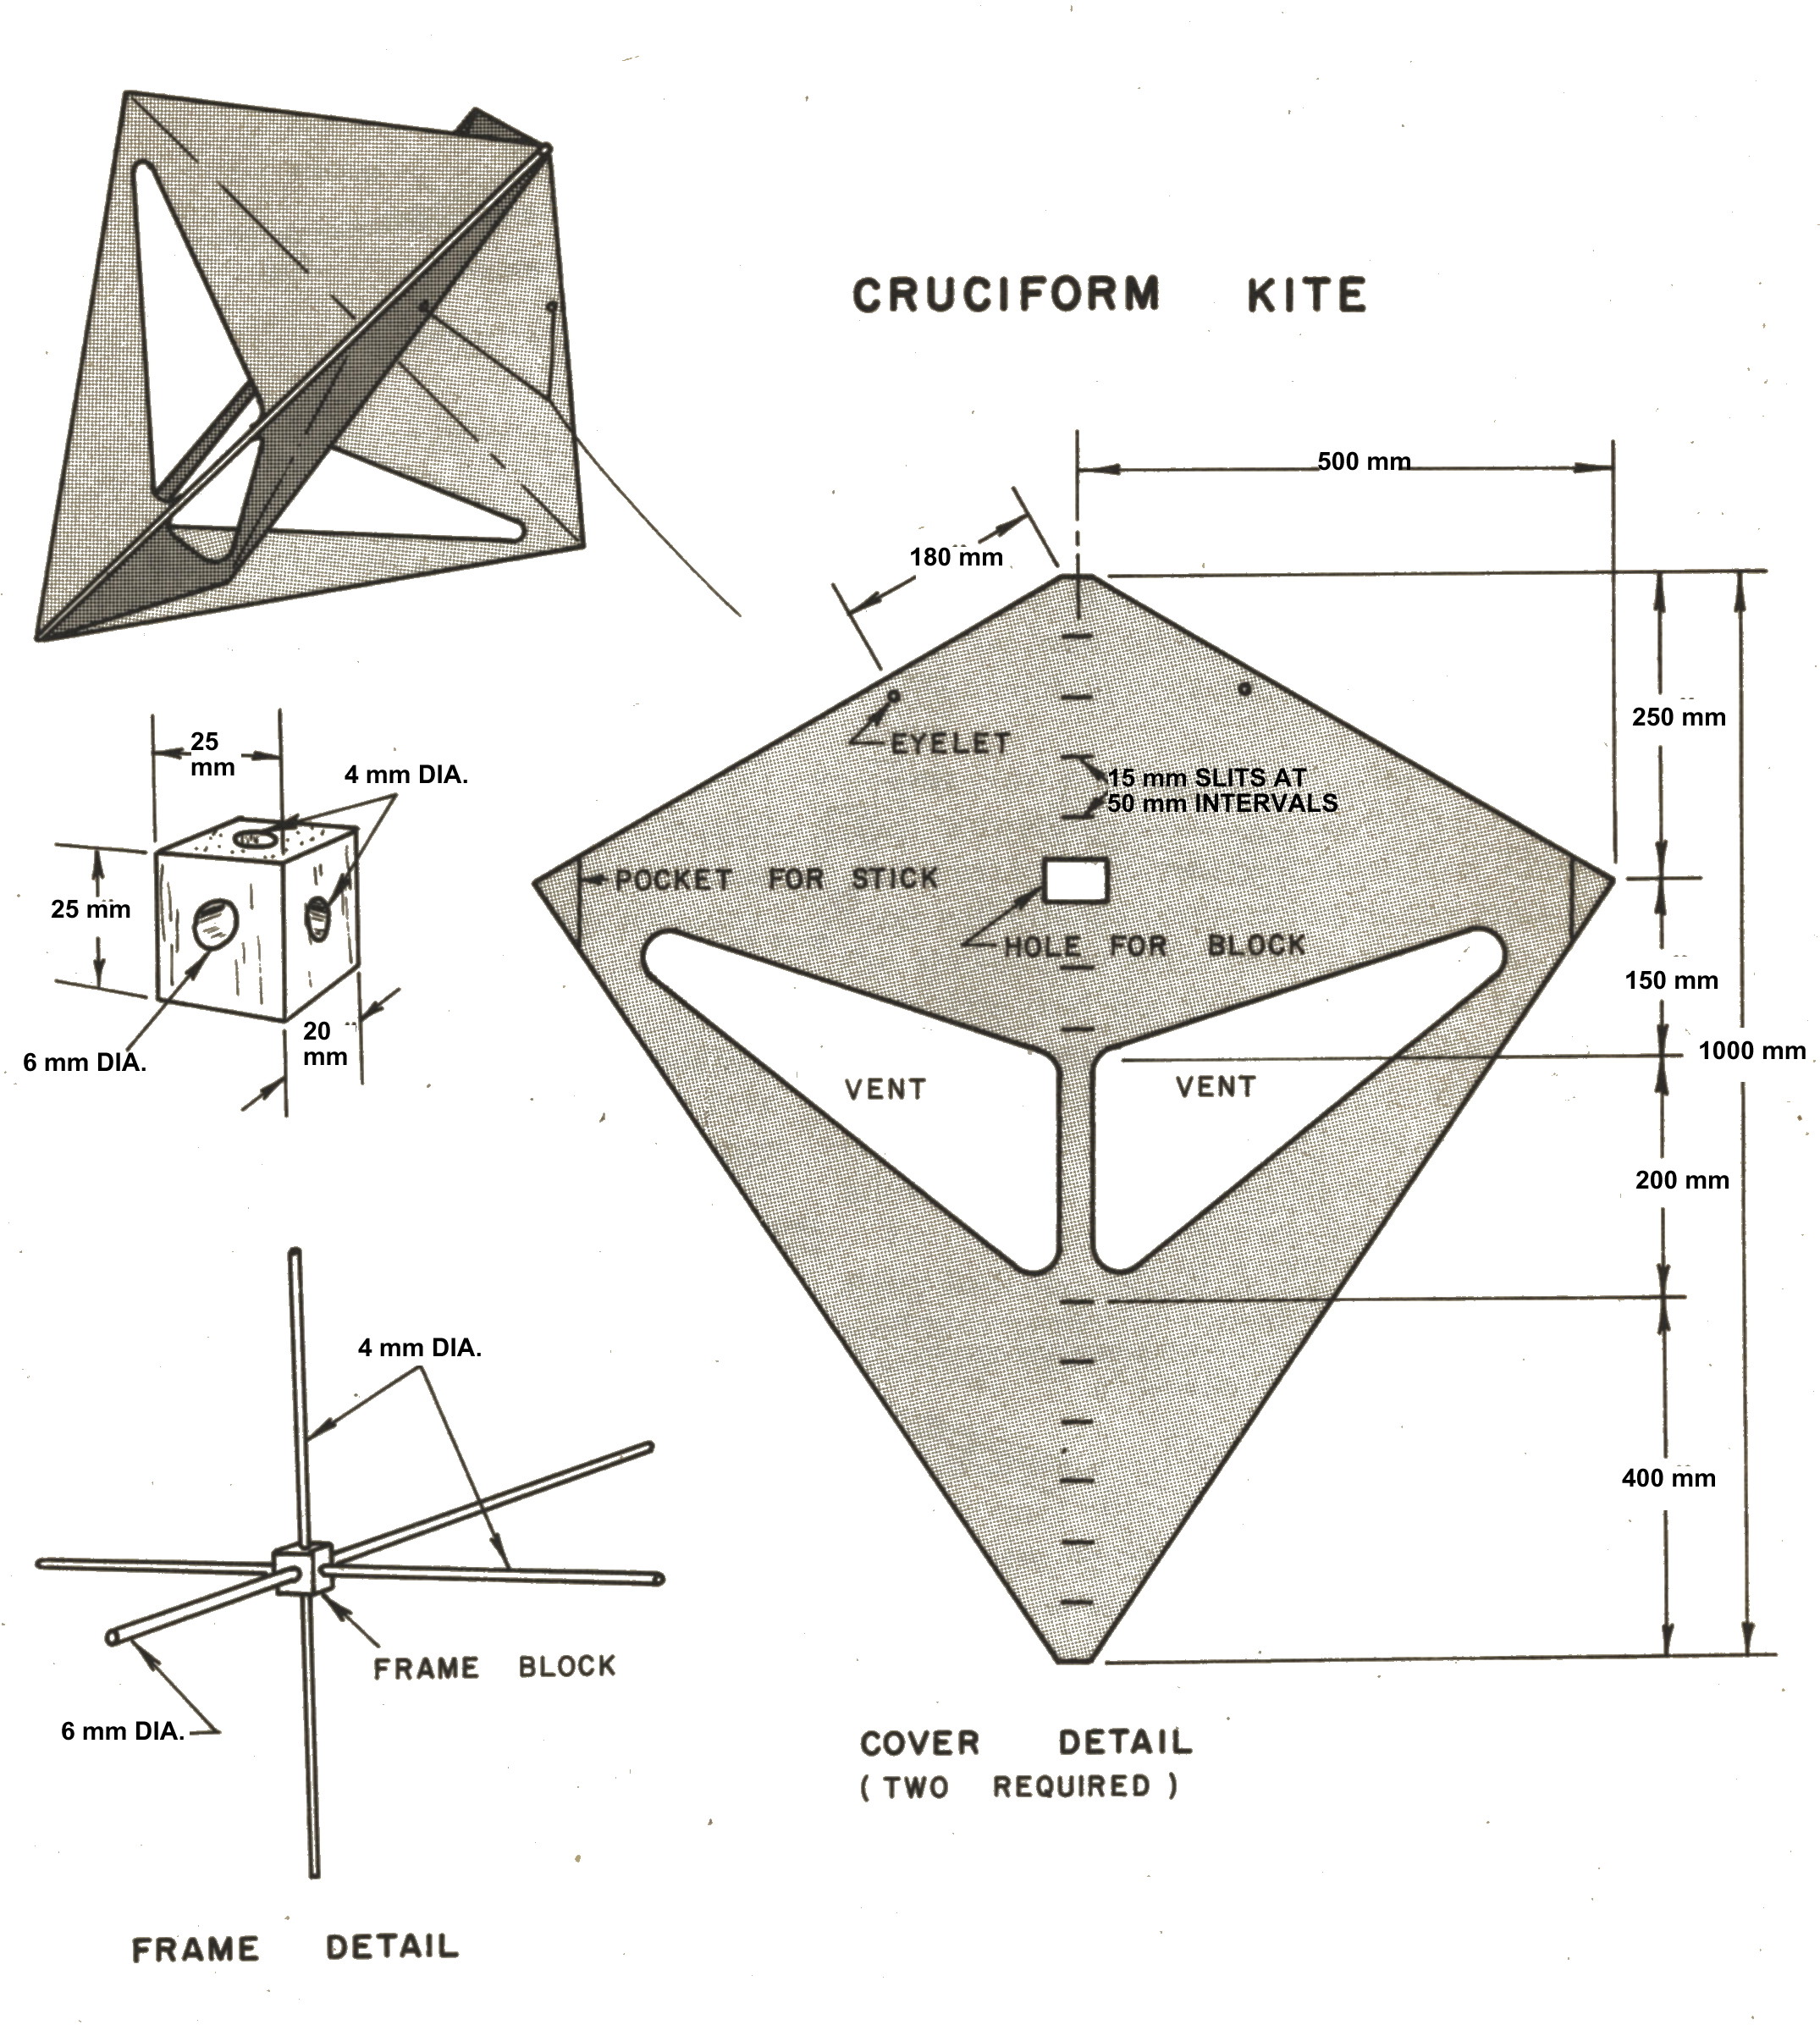
Cut out the covering to the dimensions shown on the plan, keeping in mind that you’ll need two such pieces. Next form (tape, sew or glue) a pocket in each tip to receive the spars. The two cover pieces are next joined by very carefully putting a strip of double-sided tape (adhesive on both sides) right down the centreline of one piece. Remove the tape’s backing strip and very precisely locate and press down the other cover piece. A series of approximately 10 mm. cuts is made across the centreline at 50 mm. intervals.
The rigid structure is based on the little block of wood, drilled as shown to allow the sticks to go together like a Tinkertoy. The central spine is threaded through the knife slits in the covering; and when the end of the spine reaches the square opening, slide on the wooden block. A drop of superglue will fix the block in place on the main spine. Continue the assembly until the carbon rods are completely inserted into the tip pockets, then sprung into the holes in the wooden block.
Flying: If you’re the impatient type, just tie the line onto the wooden block. Or if that’s not tidy enough for your nature, install eyelets on any two adjacent fins at the point shown. Thus a line may be attached to either point to fly the kite as a cross. Or use a “Y”-shaped bridle attached to both fins to fly as an “X”. Either way the tailless kite will fly nicely in breezes upwards of 5 or 6 knots and may be launched by simply towing it off of the ground.
Materials:
carbon tube 6 mm. x 300 mm. (1)
carbon rods 4 mm. x 500 mm. (4)
wooden block 25 x 25 x 20 mm. (1)
2 square metres of Tyvek, plastic film or light cloth
double-sided tape, superglue as required
eyelets